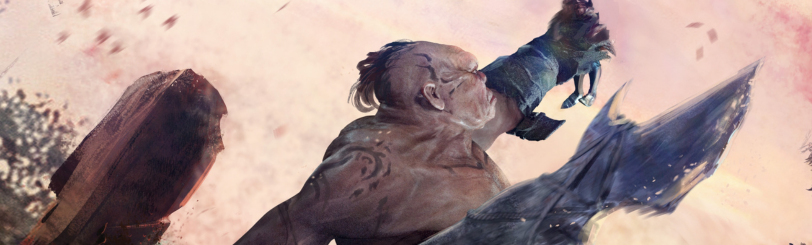

Throughout the many locations in OSRS, you will find strange and powerful enemies, some of them being of particular note. This guide will delve in-depth into a particular wilderness-dwelling boss, known as Callisto. We will need to understand where to find Callisto, then examine his stats and devise strategies based on them to ensure victory.
Where to find OSRS Callisto
Callisto will always stay hidden in his den, in the north of the wilderness. The entrance isn’t particularly hard to reach with the right tools, but the fact that it’s deep within level 40 wilderness comes with some danger. The first is that PKers are a real issue that needs to be addressed, and the fact that the boss is in a multicombat zone adds to the risk of being rushed by several coordinated players at once. These difficulties will be addressed in a later section of this guide.
Due to aggressive player-killing activity at wildy nodes, utilizing reliable Wilderness boss boosting mitigates your item risk during drop grinds.
Callisto’s stats and abilities
The best way to employ the winning strategy to beat the boss is to first gloss over what it’s capable of. Its stats will be presented below:
- HP: 1,000
- Attack: 350
- Strength: 350
- Defence: 225
- Magic: 140
- Ranged: 200
- Melee Defence: +150 (stabbing), +130 (slashing), +125 (crushing)
- Ranged Defence: +50
- Magic Defence: +0
- Weakness: Fire - 30%
As for the moveset:
- Melee Attack: Callisto swipes furiously with its claws, dealing 35 to 55 crushing damage in an area centered on the primary target. Protect from Melee will only reduce the damage of this attack by 50%.
- Ranged attack: Callisto sends out a wave against a specific target, dealing 1 to 31 ranged damage upon impact. Protect from Missiles will completely nullify this attack.
- Special attack: Callisto rears back before spitting out a magical projectile, dealing 1 to 50 magic damage in an area centered around the primary target. This attack will also knock back and stun all affected players for a short time. ‘Protect from magic’ nullifies both the damage and knockback/stunning effect of this attack.
- Bear trap attack: Upon reaching 666 and 333 HP respectively, Callisto will savagely roar, removing all movement-hindering effects such as Bind before summoning many spectral bear traps inside the arena. These bear traps do nothing on their own, but can moderately stun and deal 1 to 15 damage to unwitting players who are not watchful of where they step. There is no protection against this; be wary of where you click.
Based on the information above, we can surmise that a melee-based approach would not work too well, on account of Callisto’s high Melee Defence combined with its devastating damage potential in close-quarters. We will therefore skip a melee loadout for this guide, as no sensible OSRS player would go out of their way to kill Callisto with a melee weapon. Magic, on the other hand, seems like an excellent option out of consideration for Callisto’s lack of bonuses to Magic Defence. Combine this with its 30% weakness to fire, and you’ve got the beginnings of a fire-based Magic strategy. Lastly, ranging is also a solid choice for strategies, on account of Callisto’s moderately low Ranged Defence.
Furthermore, there is a heavy emphasis placed on protection prayers, because two attacks can be outright made null and void. Level 40 Prayer should be considered the absolute minimum for attempting to kill this boss, since it would give us access to Protect from Magic and Protect from Missiles.
🐻Note: Do not attempt a kill on Callisto if your prayer level is below 40.
Loadouts for Magic
Below is the recommended loadout for a Magic-based method, as well as a secondary, lower-level loadout that’s much more affordable. The secondary item is the minimum recommended item in each slot; do not attempt to go below this unless you are trying to complete a challenge.
Optimized Loadout (Magic)
|
Weapon Slot |
Accursed Sceptre |
|---|---|
|
Head Slot |
Imbued Slayer Helmet or Ahrim’s Hood |
|
Body Slot |
Mystic Robe Top |
|
Legs Slot |
Mystic Robe Bottom |
|
Feet Slot |
Bloodbark Boots |
|
Hands Slot |
Tormented Bracelet |
|
Shield Slot |
Elidinis Ward (f) |
|
Neck Slot |
Occult Necklace |
|
Ring Slot |
Ring of Shadows |
|
Cape Slot |
Any Imbued God Cape |
|
Ammo Slot |
Ancient Blessing |
Budget Loadout (Magic)
|
Weapon Slot |
Warped Sceptre |
|---|---|
|
Head Slot |
Any Mitre |
|
Body Slot |
Mystic Robe Top |
|
Legs Slot |
Mystic Robe Bottom |
|
Feet Slot |
Mystic Robe Boots |
|
Hands Slot |
Rune Gloves |
|
Shield Slot |
Book of Darkness |
|
Neck Slot |
Occult Necklace |
|
Ring Slot |
Ring of Shadows |
|
Cape Slot |
Any Imbued God Cape |
|
Ammo Slot |
Ancient Blessing |
As you can see, many of the items above are of a very high level. This applies even to some of the items within the budget loadout section. This is because of the nature of Callisto; the reality is that it's a high-level boss and will thus require high-level items.
Secondly, the reason the optimized loadout is running the Imbued Slayer Helmet instead of other, more heavily stat-boosting helmets is that Callisto can be given out as a slayer task. Being a bear makes it even more likely, since any regular bear slayer task will also render Callisto a legitimate target for the slayer task. All of this culminates in the Slayer Helmet being the single highest damage boosting piece of armour you could wear, boosting damage and accuracy by 15% against monsters legible for an active slayer task. If you are not currently on a slayer task where Callisto is a legible target, then using Ahrim’s Hood is a viable replacement for the Imbued Slayer Helmet.
🐻Note: Both setups are at their own extreme, with one being as strong as you would possibly need to be, whilst the other one is the bare minimum, so you are, of course, welcome to adjust your equipment to anything in between if you do not have access to specific items.
We will, of course, not forget about another extremely important aspect of preparing to take on a boss, that being the inventory and the items you carry within it. Your inventory should contain all of these items:
- Saradomin Brew 5x
- Blighted Karambwan 5x
- Blighted Anglerfish 8x
- Royal Seed Pod/ Slayer Ring/ Charged Dragonstone Jewellery 1x
- Looting Bag 1x
- Blighted Ice Sack 1x
- Stamina Potion 1x
- Blighted Super Restore 3x
- Sanfew Brew 1x
- Forgotten brew/Saturated or Imbued Heart 1x
- Phoenix Necklace 1x
Ensure that you always use the blighted version of your items, if possible, to minimize the long-term cost of this activity. The karambwans might heal less than regular food, but work as what is known as combo food or for what is referred to as combo eating. The basic idea is to take advantage of the karambwan's unique property of lacking any startup when first eating, meaning your character will immediately start eating a karambwan the moment you click on one, instead of going through a few frames of animation first. If you take a sip from your Saradomin brew and then click on a karambwan, then you can consume both in the same instance, giving yourself a burst of healing. This is useful if you’ve made a mistake and taken some heavy damage that you need to heal from. Lastly, either of the heart items is recommended over the forgotten brew if you have access to them; otherwise, the forgotten brew should work out just fine.
Now that the items are out of the way, we can shortly cover the recommended stats before moving on to the ranged setup. Here are the recommended stats for the magic method:
- HP: 80+
- Defence: 80+
- Magic: 80+
- Prayer: 40+
Whilst these are the recommended numbers, you could probably get away with slightly lower stats so long as you fill in the necessary item slots.
Loadouts for Ranged
The loadouts for Ranged follow the same format as the loadouts for Magic, with an optimized one above and a budget one below. Treat them as the parameters for minimum and maximum recommended equipment, respectively — anything between them will also suffice.
Optimized Loadout (Ranged)
|
Weapon Slot |
Webweaver Bow |
|---|---|
|
Head Slot |
Imbued Slayer Helmet or Masori Mask (f) |
|
Body Slot |
Masori Body (f) |
|
Legs Slot |
Black Dragonhide Legs |
|
Feet Slot |
Mixed Hide Boots |
|
Hands Slot |
Barrows Gloves |
|
Shield Slot |
(empty) |
|
Neck Slot |
Necklace of Anguish |
|
Ring Slot |
Ring of Shadows |
|
Cape Slot |
Ava’s Assembler |
|
Ammo Slot |
Ancient Blessing |
Budget Loadout (Ranged)
|
Weapon Slot |
Rune Crossbow |
|---|---|
|
Head Slot |
Archer Helm |
|
Body Slot |
Black Dragonhide Body |
|
Legs Slot |
Black Dragonhide Legs |
|
Feet Slot |
Mixed Hide Boots |
|
Hands Slot |
Black Dragonhide Vambraces |
|
Shield Slot |
Book of Law |
|
Neck Slot |
Amulet of Glory |
|
Ring Slot |
Imbued Ring of Wealth |
|
Cape Slot |
Ava’s Accumulator |
|
Ammo Slot |
Diamond Tipped Bolts |
There isn’t much to say that hasn’t been said in the section about the magic loadout; all you need to know is that, without an active slayer task with Callisto on it, a viable replacement for the Imbued Slayer Helmet in the optimized setup is the Masori Mask (f).
In terms of inventory, the items look very similar, with a few tweaks to the potions.
- Saradomin Brew 5x
- Blighted Karambwan 5x
- Blighted Anglerfish 8x
- Royal Seed Pod/ Slayer Ring/ Charged Dragonstone Jewellery 1x
- Looting Bag 1x
- Blighted Ice Sack 1x
- Stamina Potion 1x
- Blighted Super Restore 3x
- Sanfew Brew 1x
- Divine Ranging Potion 1x
- Phoenix Necklace 1x
Again, there isn’t anything to say that hasn’t been said in the magic section, so let’s move on to the main strategy section.
Callisto Strategy and Tactics
As established previously, Callisto is an absolute powerhouse in melee, meaning we will be more comfortable at a distance — this is the reason for bringing along the Blighted Ice sack. With it, regardless of us having Ancient Magicks prepared or not, we will be able to cast Ice Barrage, freezing Callisto in place for a good 20 seconds, allowing us to dish out damage from a comfortable distance. The moment you enter the boss's room, this will be the first thing you do, even before buffing. If you’re going with the ranged method, using the Rapid attack style will yield the highest damage output. As for magic, it’s pretty easy, just use the heaviest-hitting fire-based attack from the Standard Spellbook.
Secondly, be attentive to your prayer and use super restore potions both to cleanse the debuff inflicted by your Saradomin brews as well as restore your prayer points. Chances are, you will have Protect from Missiles on for about 90% of this fight, so prayer points are important to upkeep. You will, however, need to swap your prayer out for the occasional special attack coming your way. Remember that it’s telegraphed pretty heavily by Callisto rearing back, so you have time to react and swap to Protect from Magic. As for the bear traps, the best advice I can offer is to be in a relatively open area where you have options to move. This minimizes the chances of you being stuck between a wall with bear traps blocking your way from going anywhere else.
Lastly, be attentive to Callisto’s HP. You may find yourself in a situation where Callisto is at about 70% HP and has just been frozen. In this situation, it’s important to be mindful of the fact that Callisto cleanses all freezing/binding debuffs when unleashing the bear traps at 66 and 33% HP. Be prepared to re-freeze when approaching those health thresholds, even if you’ve recently frozen Callisto.
How to handle PKers
With everything related to the boss now over and done with, we can cover a natural but annoying aspect of bossing in the wilderness: PKers. The most important aspect of successfully running away from a PKer is to position yourself near the exit/entrance of Callisto’s den, giving you easy access to an escape route compared to if you’re on the opposite side. Running as fast as you can to the exit should be one of the first things you do, along with praying Protect from Magic to defend yourself from spells such as Ice Barrage and swapping in your Phoenix Necklace to protect yourself from burst damage.
After exiting, you’ll find yourself at one of 3 random points in the Escape Caves, but it's not over yet, as any player who exits the same boss room within 10 seconds will arrive at the same location, meaning they’ll be able to follow you. Regardless of where you are, you need to get to the closest exit to the surface, afterwards run south until you hit level 30 wilderness, and use your Royal Seed Pod/Slayer Ring/Charged Dragonstone Jewellery. If you’ve successfully managed to do this, you’ve escaped a PK attempt and will find yourself in the safety of the non-wilderness. Congratulations!
DROPS
Bosses in multicombat areas are unique when it comes to drops — since the boss is made with multiple players in mind, each player will get their fair share of loot. This is a nice mechanic that eliminates the need to split loot manually and prevents certain players from deceitfully taking the lion's share. However, it is worth noting that you only get 25% as much loot when killing Callisto as a group compared to someone doing it solo.
The average Callisto kill is worth about 170k Coins. Big bones are dropped if you were the player who dealt the most damage to the boss, whilst regular bones are dropped for everyone else.
🐻Note: The listed prices for the drop table are taken from the time of writing this guide; they are thus subject to change and variance over time. If you’ve come across this article far in the future, it is advisable to double-check the prices through another source.
100%
|
ITEM |
QUANTITY |
RARITY |
PRICE IN COINS |
|---|---|---|---|
|
Big Bones |
1 |
Always |
154 |
|
Bones |
1 |
Always |
32 |
Unique
|
ITEM |
QUANTITY |
RARITY |
PRICE IN COINS |
|---|---|---|---|
|
Claws of Callisto |
1 |
1/196 |
48,338 |
|
Dragon 2h Sword |
1 |
1/256 |
131,273 |
|
Dragon Pickaxe |
1 |
1/256 |
756,313 |
|
Voidwaker Hilt |
1 |
1/360 |
10,371,579 |
|
Tyrannical Ring |
1 |
1/512 |
189,737 |
Weapons and Armour
|
ITEM |
QUANTITY |
RARITY |
PRICE IN COINS |
|---|---|---|---|
|
Rune Pickaxe |
5 (noted) |
1/15.75 |
93,090 |
|
Rune 2h Sword |
3 (noted) |
1/42 |
114,075 |
|
Mystic Earth Staff |
4 (noted) |
1/63 |
101,924 |
|
Mystic Robe Top |
4 (noted) |
1/63 |
286,256 |
|
Mystic Robe Bottom |
4 (noted) |
1/63 |
190,056 |
|
Rune Kiteshield |
4 (noted) |
1/63 |
128,464 |
|
Rune Platebody |
4 (noted) |
1/63 |
154,9076 |
Runes and Ammunition
|
ITEM |
QUANTITY |
RARITY |
PRICE IN COINS |
|---|---|---|---|
|
Blood Rune |
500 |
1/18 |
102,000 |
|
Death Rune |
700 |
1/18 |
86,100 |
|
Chaos Rune |
900 |
1/18 |
52,200 |
|
Soul Rune |
450 |
1/25.2 |
74,600 |
|
Cannonball |
600 |
1/31.5 |
111,600 |
Materials
|
ITEM |
QUANTITY |
RARITY |
PRICE IN COINS |
|---|---|---|---|
|
Mahogany Logs |
600 (noted) |
1/21 |
193,800 |
|
Limpwurt Root |
100 (noted) |
1/25.2 |
23,300 |
|
Magic Logs |
225 (noted) |
1/25.2 |
213,075 |
|
Unct Ruby |
50 (noted) |
1/31.5 |
63,500 |
|
Uncut Diamond |
25 (noted) |
1/42 |
54,275 |
|
Red Dragonhide |
170 (noted) |
1/42 |
349,180 |
|
Uncut Dragonstone |
5 (noted) |
1/63 |
77,270 |
|
Coconut |
135 (noted) |
1/63 |
156,600 |
|
Grimy Toadflax |
100 (noted) |
1/126 |
411,600 |
|
Grimy Dwarf Weed |
45 (noted) |
1/126 |
176,715 |
|
Grimy Ranarr Weed |
45 (noted) |
1/126 |
338,760 |
|
Grimy Snapdragon |
45 (noted) |
1/126 |
564,210 |
Seeds
|
ITEM |
QUANTITY |
RARITY |
PRICE IN COINS |
|---|---|---|---|
|
Ranarr Seed |
11 |
1/25.2 |
282,260 |
|
Snapdragon Seed |
5 |
1/25.2 |
355,930 |
Other
|
ITEM |
QUANTITY |
RARITY |
PRICE IN COINS |
|---|---|---|---|
|
Coins |
50,000 |
1/12.6 |
50,000 |
|
Dark Crab |
50 |
1/25.2 |
94,100 |
|
Super Restore(4) |
10 |
1/25.2 |
173,180 |
|
Supercompost |
225 |
1/31.5 |
4,500 |
|
Dragon Bones |
75 |
1/42 |
154,725 |
|
Wilderness Crabs Teleport |
4 |
1/42 |
107,780 |
|
Blighted Anglerfish |
100 |
1/126 |
14,200 |
Secondary Supply Roll
|
ITEM |
QUANTITY |
RARITY |
PRICE IN COINS |
|---|---|---|---|
|
Blighted Anglerfish |
5-6 |
1/18 |
710-852 |
|
Blighted Karambwan |
5-6 |
1/18 |
685-822 |
|
Blighted Super Restore(3) |
3-4 |
1/18 |
Not sold |
|
Blighted Super Restore(4) |
3-4 |
1/18 |
6,390-8,520 |
|
Rangin Potion(2) |
2-3 |
1/18 |
5,084-7,626 |
|
Super Combat Potion(2) |
2-3 |
1/18 |
18,366-27,549 |
Tertiary
|
ITEM |
QUANTITY |
RARITY |
PRICE IN COINS |
|---|---|---|---|
|
Looting Bag |
1 |
1/3 |
Not sold |
|
Brimstone key |
1 |
1/50 |
Not sold |
|
Clue Scroll (elite) |
1 |
1/100 |
Not sold |
|
Long Bone |
1 |
1/400 |
Not sold |
|
Callisto Cub |
1 |
1/1,500 |
Not sold |
|
Curved Bone |
1 |
1/5,013 |
Not sold |
The Brimstone Key will only drop while on a slayer task given by Konar quo Maten.
Tertiary
|
ITEM |
QUANTITY |
RARITY |
PRICE IN COINS |
|---|---|---|---|
|
Slayer’s Enchantment |
1 |
1/30 |
2,182 |
|
Larran’s Key |
1 |
1/50 |
137,209 |